The way a soil sample is taken is extremely important as the information you receive from the soil tests will only be as good as the samples you send for analysis.
In this article I will cover the basics on how to take a soil sample, where to test, how many soil samples you should take and what a soil sample analysis report looks like.
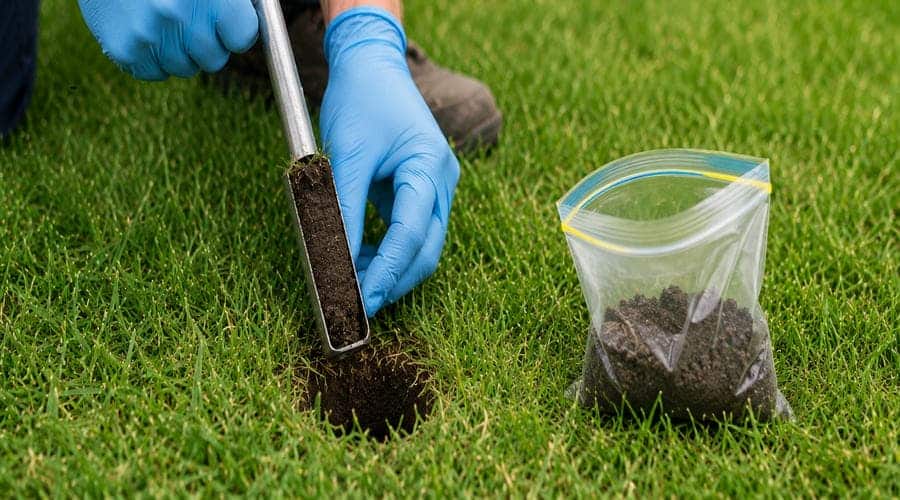
What do I need to collect good soil samples?
If you are looking for soil sample testing in your own garden, a field or new site following the instructions below will help to assure that the samples you send are collected and prepared ready for analysis in the lab
- A soil probe, auger or spade/ trowel
- A sterile plastic zip lock sample bag (e.g. sandwich bag) per site
- Waterproof marker pen to label bags
- Gloves
- A cool bag to keep samples cool until they can be placed in a fridge
- Where possible, a soil thermometer to record the temperature of the soil at the time of sampling
- spatula or clean flat-headed screwdriver is useful for removing the soil sample from the auger
Soil Sample collection and preparation
Preparation for the Soil Sample
Prepare a sterile zip lock bag such as a sandwich bag for each site where samples are to be taken. Clearly label each bag using a permanent marker, such as a Sharpie, with the customer name, sample site location and date.
It is good practice to do this on each side of the bag in case ink rubs off in transit.
This months Lawncare Picks
How many soil samples should i take?
In certain situations, such as a study or trial, it may prove beneficial to plan for a multiple number of (sample) replicates to ensure it is possible to determine statistical significance if appropriate.
Depending on the size of the area and number of plants being assessed, take samples from several carefully planned locations using a ‘W transect’, ensuring the whole soil profile is represented.
Where do I take a Soil Sample from?
Soil should be collected from a mixture of distances between the base of crops and plants, ranging from 2cm up to approximately 30cm, covering the whole group or area.
The ‘W’ method is adaptable to most cohorts of trees, plants, shrubs and field or area shape but you should avoid the edges of an area of land, field or plot, gateways or sections that are not representative of the sample section as a whole.
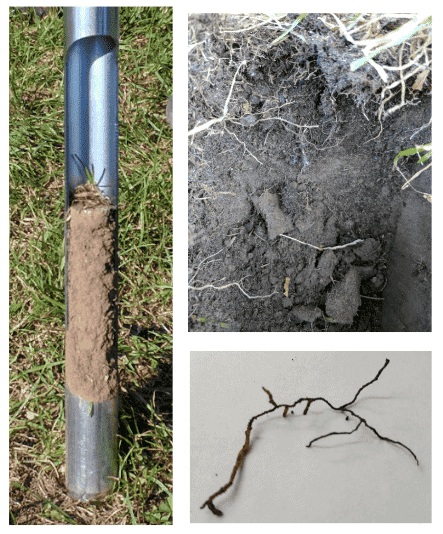
Soil Sample Collection Methods
For soil analysis using an auger or trowel take samples to a depth between 2-10 cm.
If you are using a spade or trowel, dig a V-shaped hole to sample depth, then cut a thin slice with a garden knife or clean bladed implement.Remove the surface section of the sample that may contain grass or debris and organic matter that may affect the analysis.
Aggregate and mix the samples in a clean plastic bucket.
If planning on having comprehensive biological and chemical analysis, you should aim to collect at least 500 g (1 litre) of soil and roots from the aggregated samples from the site into the prepared bag, leaving a little air in the bag.
When testing for mycorrhizal colonisation, ensure that there are tree/plant roots present in the prepared sample.
Often it is better to sample tree roots as a separate process, collecting fresh (living) roots from the upper soil fraction –depending on the plant species these may be found in close proximity to the plant base (< 10cm) or further out in the root area.
Collecting an adequate amount of roots from throughout the sample area is vital to achieving accurate information. This may require collection of a minimum 5 or 6 root fragments, of approximately 5cm each, from different points or crops within the sample area.
In order to preserve and protect them, root fragments are best placed in the bag of soil, from the same sample group, for transporting.Sometimes it easier to extract the whole plant (including roots) and place this in a sample bag with the root ball of soil, for analysis.
How to send Soil Samples to the Lab?
STORAGE AND PACKAGING
Store samples in a cool bag whilst in the field.After collection and prior to packaging and sending to the lab, keep the samples cool and out of direct sunlight.
A typical household fridge will be fine.Place in a padded envelope and send by overnight post or courier to the laboratory.We recommend not sending samples to a laboratory if they will arrive at the weekend.
SAMPLE RECORD
Include a sheet of paper in the sample envelope listing the samples included.
On the back write any additional information for reference such as –sampling date, conditions on the day, water saturation, approximate temperature, ground notes if known e.g. compaction, soil character (heavy clay/sandy loam etc), land management (ploughed, intensive use by stock, people, dog fouling etc)